Forms is a powerful tool that allows you to create online quizzes and surveys with ease. You can use Forms to collect feedback, measure satisfaction, test knowledge, and more.
In this blog post, we will show you how to use Forms to create quizzes and surveys in a few simple steps.
Create a new form
To create a new form, go to forms.microsoft.com and sign in with your Microsoft account. You will see a dashboard where you can view your existing forms or create a new one.

Click on the New Form button to start a blank form, or choose one of the templates to get started quickly.
Add questions and options
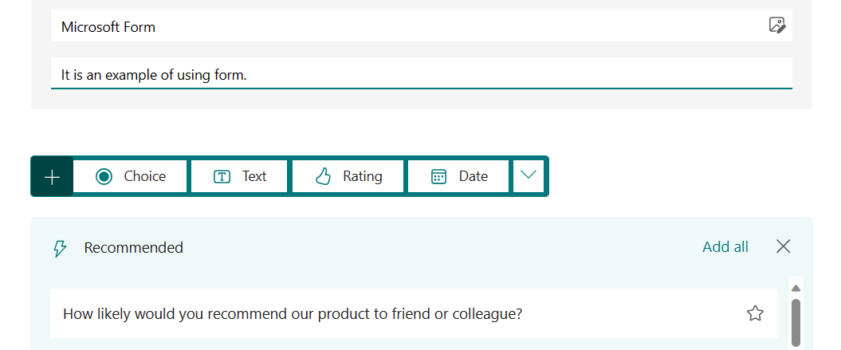
Once you have created a new form, you can start adding questions and options for your quiz or survey. You can choose from different types of questions, such as multiple choice, text, rating, date, file upload, and more.
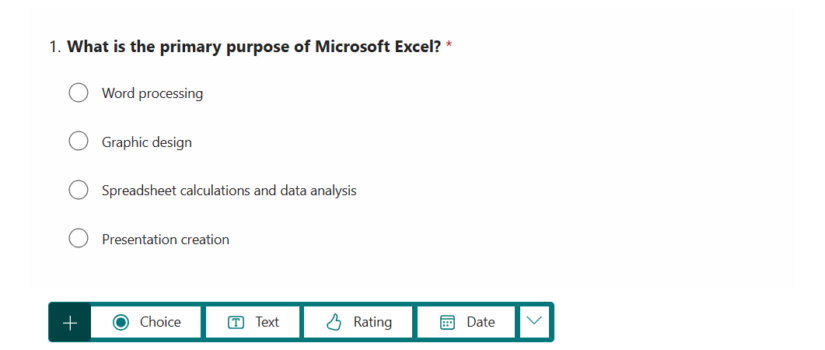
To add a question, click on the Add New button and select the question type. Then, enter the question text and the possible options or settings for the question.
You can also add media, such as images or videos, to your questions by clicking on the Insert Media button.
Customize the settings and appearance
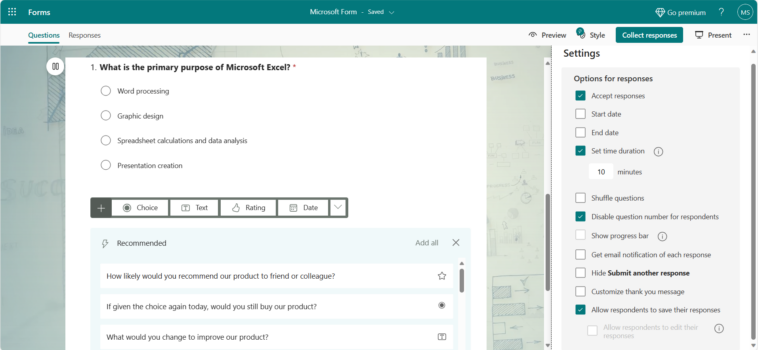
After adding the questions and options, you can customize the settings and appearance of your form.
You can access the settings by clicking on the More Options button (three dots) at the top right corner of your form.
Here, you can change the name and description of your form, set a start and end date, enable or disable email notifications, shuffle the questions, and more. You can also access the theme options by clicking on the Theme button at the top right corner of your form.
Here, you can choose from different colors and backgrounds for your form, or upload your own image.
Turn your form into a quiz
If you want to turn your form into a quiz, you can enable the quiz mode by clicking on the More Options button and selecting Settings.
Then, toggle on the Quiz option under Mode. This will allow you to assign points and correct answers to your questions, as well as provide feedback and hints to your respondents. To assign points and correct answers, click on the question and select Answer Key.
Then, enter the points for each question and mark the correct option or options. You can also add feedback and hints for each option by clicking on Add Feedback or Add Hint.
Share your form
Once you have finished creating your quiz or survey, you can share it with others by clicking on the collect response button at the top right corner of your form.
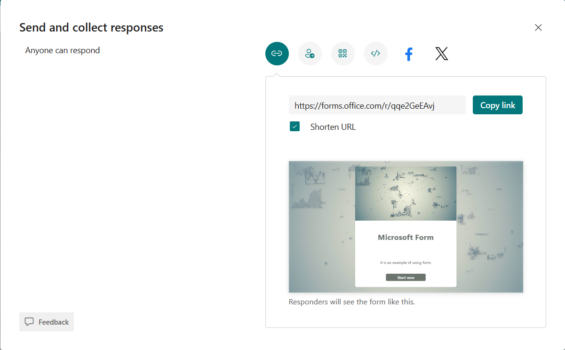
You can choose from different sharing options, such as sending a link or QR code, embedding your form on a web page, or sending an email invitation.
You can also adjust the sharing permissions by clicking on the More Options button and selecting Anyone with the link can respond, Only people in my organization can respond, or Specific people in my organization can respond.
View and analyze the results
After sharing your form, you can view and analyze the results by clicking on the Responses tab at the top of your form.
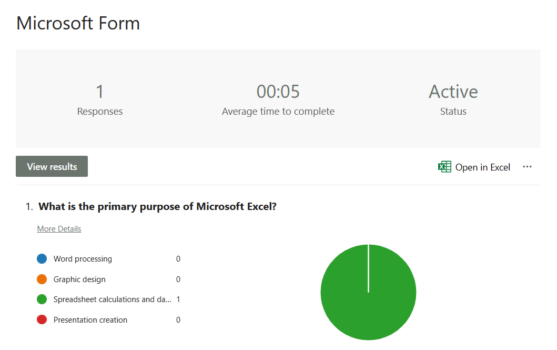
Here, you can see how many people have responded to your form, as well as their individual responses and scores (if applicable).
You can also view a summary of the results by clicking on the Summary tab. Here, you can see charts and graphs that show the distribution of responses for each question. You can also export the results to Excel by clicking on the Open in Excel button.